Learning how to sight in a thermal scope trips up a lot of first-time thermal shooters for one simple reason: a paper bullseye is invisible through the optic. Thermal reads heat, not ink, so you need a target that shows up warm, plus a steady rest and a few minutes of patience. The good news is that the ATN ThOR 6 640x512 3-24x makes the actual adjusting part almost too easy with a feature called Zeroing Freeze. Fire a shot, freeze the reticle, drag the aiming point onto your impact — you do not have to hold the rifle rock-steady while you dial. This walks you through the whole process, start to finish, in plain English.
What you need
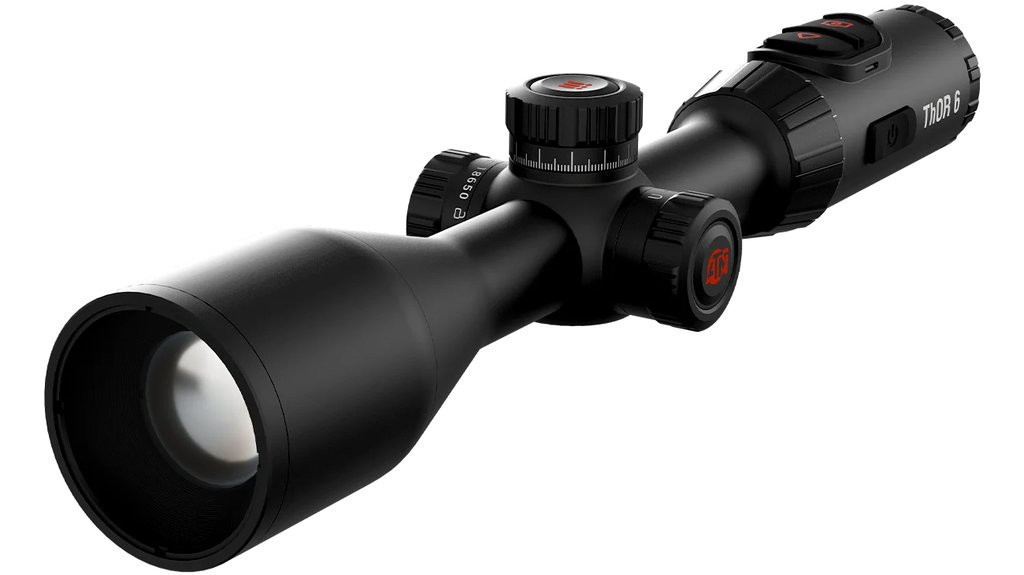
- An ATN ThOR 6 thermal scope — this guide uses the ThOR 6 640x512 3-24x, with the 640x512 sensor and Zeroing Freeze. The ThOR 6 640x512 2-16x and ThOR 6 384x288 2.5-20x zero exactly the same way.
- A heat-emitting target — the one thing people forget. A paper bull is invisible to thermal, so use a chemical hand warmer taped to a backer, a purpose-built heated target board, or a reactive thermal target. Anything that runs a few degrees warmer than the backdrop will glow through the scope.
- A solid rest — front and rear bags, a bipod, or a bench. The steadier the rifle sits, the tighter your group and the truer your zero.
- Ammo you will actually hunt with — zero on the same load you plan to shoot. A dozen rounds is plenty; the same box you carry in the field is best.
- A small level — a bubble level on the rail or a plumb line downrange, so the reticle is not canted. A tilted scope throws shots sideways as distance grows.
- A known distance — set the target at 50 or 100 yards and measure it. Fifty is friendlier for a first thermal zero; 100 is standard once you are comfortable.
How to sight in a thermal scope, step by step
- Mount and level the scope first. Seat the 830 g / 1.83 lbs ThOR 6 low and true in a quality one-piece mount or matched rings, then level the reticle against a bubble level or a plumb line before you torque anything down. Success looks like a scope that sits square over the bore with a repeatable cheek weld — get this wrong and no amount of zeroing will fix a canted reticle.
- Set your heat target at 50 or 100 yards. Tape a hand warmer to the backer or switch on a heated board and give it a couple of minutes to warm. Success looks like a clean, bright hot spot when you look through the scope — a distinct glow you can put the reticle on, not a vague smudge.
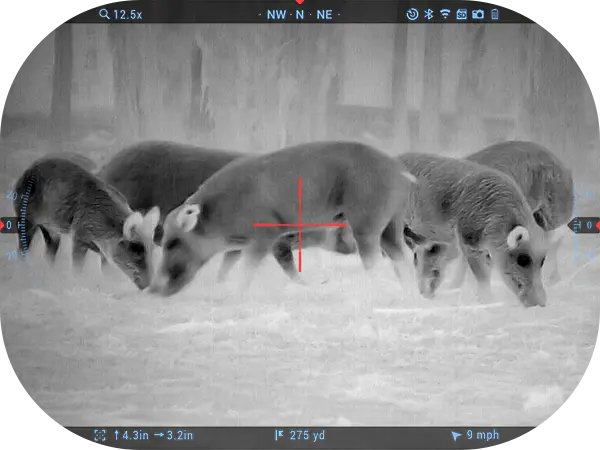
- Power on and focus the image. Turn the ThOR 6 on, let the sensor settle, and adjust the eyepiece diopter and the objective focus until the reticle and the hot target are both crisp. The 640x512 sensor packs in more heat-reading pixels — think SD stepping up to HD — so a focused picture gives you a sharp edge to aim at. Success is a target that looks like a defined shape, not a fuzzy blob.
- Enter the zeroing menu and pick your distance. Open the ThOR 6 zeroing mode and set the distance to match your target — 50 or 100 yards. Success looks like the scope showing its zeroing reticle, ready to record where your shot lands relative to where you aimed.
- Settle in and fire a group. Get behind the rifle square, load the rest, and fire three rounds at the center of the hot target, aiming at the exact same spot each time. Success is a tight little cluster you can clearly see glowing warm on the display — fresh bullet holes and disturbed backer often read warm for a moment, which helps.
- Use Zeroing Freeze to move the reticle onto the impact. This is the whole trick. With the reticle held on your aim point, trigger Zeroing Freeze so the display locks the frame. Now, without needing to keep the rifle perfectly still, move the aiming reticle over onto the center of your group. Success looks like the reticle sitting right on top of your actual impact — the scope now knows the gap between where you aimed and where the bullet went.
- Confirm with a second group. Fire another three rounds at the hot spot. Success is a group that now lands where the reticle is pointed. If it is still off a touch, run Zeroing Freeze once more and nudge the reticle again — small corrections close the last bit quickly.
- Save the profile. Store the zero as a profile in the ThOR 6 so it is there next session and you are not re-zeroing every time you head out. Success looks like a saved distance profile you can recall in seconds. Turn on Recoil Activated Video (RAV) if you want the scope to record each confirming shot for review.
Tips and common mistakes
- Do not skip the heat target. The number one thermal-zeroing mistake is taping up a plain paper bull and wondering why nothing shows. Thermal sees heat — give it a warm point to aim at.
- Let the target warm up. A hand warmer needs a few minutes to reach full glow. Rush it and the hot spot is faint and hard to center.
- Zero at a real, measured distance. Guessing '≈100 yards' bakes error into every shot. Measure once and know your number.
- Check the reticle is level. A canted scope looks fine at 25 yards and throws you off badly at range. The level goes on before the first shot, not after.
- Fire groups, not single shots. One round can lie. Three rounds show you where the rifle really prints so you zero to the center of the group.
- Use the same load every time. Different ammo changes point of impact. Zero on, and hunt with, the same box.
- Confirm before you trust it. After you move the reticle with Zeroing Freeze, always fire a confirming group. A zero you have not verified is a guess.
- Save it and re-check it. Store the profile, then re-confirm at the start of a season or after any hard knock to the rifle.
The reason the ThOR 6 makes this so painless is the combination of a clean picture and forgiving controls. The ATN ThOR 6 640x512 3-24x pairs its high-resolution 640x512 sensor and ≤15 mK NETD — a thermal sensitivity that low means it separates a warm target from a cooler background cleanly, so your hot spot really stands out — with SharpIR AI and a Full-HD OLED display, so the aiming point is sharp when you dial it in. Zeroing Freeze does the heavy lifting, and the 3-24x zoom lets you magnify the group before you make the final move. You can browse the rest of the ATN thermal scopes if you want a different magnification or sensor, but every ThOR 6 zeros with the same freeze-and-move workflow.
How we tested this
This is in-house guidance built around ATN's own current 6th-generation ThOR 6 line, not an independent lab test. We wrote the steps around the way the ThOR 6 640x512 3-24x actually zeros — heat target, group, Zeroing Freeze, confirm, save — and the same process applies to the ThOR 6 640x512 2-16x and the ThOR 6 384x288 2.5-20x. Honest note: exact numbers vary with your rifle, load, mount and the distance you choose, so treat the 50 or 100 yard figures as starting points and confirm on your own setup. This guide is not for someone expecting a magic one-shot zero with no rest and no heat source — thermal still rewards a steady platform and a warm target, the same fundamentals as any precision zero.
Frequently Asked Questions
Why can't I see a paper target through my thermal scope?
Thermal scopes read heat, not visible ink, so a plain paper bullseye at ambient temperature is essentially invisible. You need a heat-emitting target — a chemical hand warmer taped to a backer, a heated target board, or a reactive thermal target. Give it a couple of minutes to warm up and it will glow clearly through the scope.
What is Zeroing Freeze and how does it help?
Zeroing Freeze is an ATN ThOR 6 feature that locks the display image after you fire, so you can move the aiming reticle onto your actual bullet impact without holding the rifle perfectly still. It removes the hardest part of zeroing — keeping steady while you adjust — and turns sighting in into a simple point-and-move task.
Should I sight in at 50 or 100 yards?
Either works. Fifty yards is friendlier for a first thermal zero because the target is bigger in the picture and the hot spot is easy to center. One hundred yards is the standard once you are comfortable and gives a flatter useful trajectory for most hunting distances. Measure whichever you pick so your zero is honest.
How many shots does it take to zero a thermal scope?
Plan on a dozen rounds or so. Fire a three-round group to see where the rifle prints, move the reticle with Zeroing Freeze, then fire another confirming group, repeating small corrections until impacts land under the reticle. Groups rather than single shots keep you from chasing one stray round.
Do I need a special heated target for the ATN ThOR 6?
You need something warm, but it does not have to be fancy. A chemical hand warmer taped to a cardboard or foam backer works fine, as does a purpose-made heated target board or a reactive thermal target. The only requirement is that it reads a few degrees warmer than the background so it shows up as a clear hot spot.
Will my zero stay saved when I turn the scope off?
Yes. Once you save the zero as a profile on the ThOR 6, it is stored and recalled the next time you power up, so you are not re-zeroing every outing. It is still smart to re-confirm at the start of a season or after any hard bump to the rifle or mount.
Can I zero the ThOR 6 in daylight?
Yes. Thermal works day or night since it reads heat, and a warm target actually contrasts well against a cool morning backdrop. Just make sure your heat source is glowing clearly and your rest is steady — the process is identical whether you sight in at noon or after dark.
Ready to get a rock-solid zero without the wrestling match? The ATN ThOR 6 640x512 3-24x pairs a sharp 640x512 sensor with Zeroing Freeze, so you fire, freeze, move the reticle onto your impact, and save the profile — sighting in becomes a five-minute job instead of a frustration. If you want a different magnification, sensor size or weight, compare the full lineup of ATN thermal scopes and pick the one that fits your rifle. Whichever you choose, they all zero with the same simple freeze-and-move workflow, so you can spend less time on the bench and more time in the field.
Created: August 10, 2026 · 10:05:21 UTC