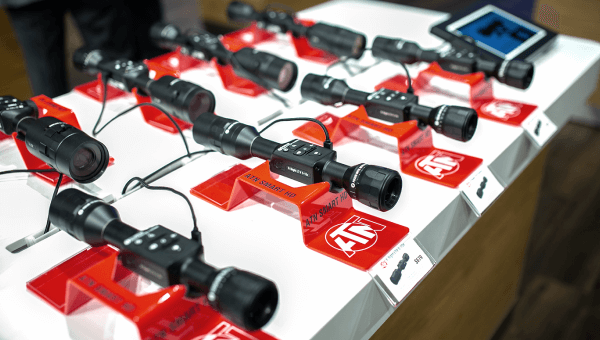
Sighting in a thermal scope means mounting it securely, firing a shot from a stable rest, and using the scope's on-screen zeroing tools to move the reticle onto your actual point of impact instead of adjusting external turrets. It's faster than sighting in a traditional day scope because the reticle moves digitally, but it still depends on a solid mount and a heat-visible target. We'll walk through it using the ATN ThOR 6 640 2-16x (TIWST6635A), which includes the Control Wheel interface, Zeroing Freeze, and the heated zeroing target this guide is built around.
What You Need
- A thermal scope with a digital zeroing function. The ATN ThOR 6 640 2-16x, used as the example here, has a Control Wheel-driven Zeroing Profile and Zeroing Setup menu that moves the reticle in software instead of external turret clicks.
- 30mm mounting rings. The ThOR 6 640 2-16x doesn't ship with rings, so you'll need a set rated for your rifle's rail before mounting.
- A heated zeroing target. The ThOR 6 640 2-16x ships with a heating target in the box, giving a clean, consistent thermal signature regardless of ambient temperature or daylight.
- A stable rest. A bench, bipod, or sandbags — anything that removes your own hold from the equation while confirming point of impact.
- Ammunition you'll actually hunt with. Zeroing with a different load introduces a variable you don't need.

Steps to Sight In Your Thermal Scope
-
Mount the scope in the rings and level it before tightening anything down.
Set the ThOR 6 640 2-16x in its 30mm rings on the rail, and confirm the scope sits level relative to the bore with comfortable eye relief before final tightening. Success looks like: the reticle orientation is square with the rifle when you shoulder it naturally, with no rotation left or right.
-
Snug the rings evenly, alternating sides, without over-tightening.
Tighten ring screws a little at a time, alternating between screws so the tube isn't compressed unevenly on one side first. Success looks like: the scope doesn't shift or rotate under firm hand pressure, with no visible gap where the rings meet the tube.
-
Power on the scope and set up a shooting profile.
Use the Control Wheel to open the menu and confirm you're in the correct Zeroing Profile for this rifle and load — the ThOR 6 640 2-16x can store multiple profiles, useful if you swap the scope between rifles. Success looks like: the profile name and reticle you expect are on screen before you fire.
-
Set up the heated zeroing target at your chosen distance and get a stable rest.
Place the included heating target downrange at your zeroing distance, then settle into your rest so the crosshair holds still without your input. Success looks like: the target reads as a clean, distinct hot signature against its background, with the reticle steady on it.
-
Fire a single shot at the target's center and use Zeroing Freeze to lock the frame.
After the shot breaks, Zeroing Freeze pauses the image at the moment of impact so you're not marking a point of impact on a live, moving feed. Success looks like: a frozen frame with a visible impact point relative to your original aim point.
-
Open Zeroing Setup and move the reticle to the point of impact.
In Zeroing Setup, use Position Adjustment to shift the reticle along the X and Y axes with the Control Wheel until it sits on the frozen impact point rather than your original aim point. Success looks like: the reticle overlays the actual bullet hole in the frozen frame.
-
Zoom in and fine-tune the reticle position before saving.
Use the Zoom option inside Zeroing Setup to magnify the frozen frame, making small adjustments more precise than eyeballing them at full field of view. Success looks like: at maximum zoom, the reticle center and impact point line up as closely as target resolution allows.
-
Save the adjustment and unfreeze the frame.
Confirm the position with the Control Wheel to save it to the active Zeroing Profile, then return to the live thermal feed. Success looks like: the menu closes back to normal thermal view, with the reticle visibly moved from before.
-
Fire a confirmation shot without touching the reticle.
Aim dead center with the newly adjusted reticle and fire again from the same stable rest. Success looks like: the new impact lands on or very close to your point of aim.
-
Repeat fine adjustment only if the confirmation shot is off.
If the confirmation shot isn't centered, freeze the frame again, reopen Zeroing Setup, and repeat the position-adjustment step. Success looks like: two consecutive shots landing at your point of aim — your working zero.

Tips and Common Mistakes
- Don't skip the confirmation shot. A single shot can be affected by an unstable rest or a flinch — treat the first shot as data for the adjustment and the second as verification.
- Watch for a shifting rest, not a shifting scope. If zero seems to move between sessions, check your rest and rings before assuming the scope lost its setting — a loose screw or inconsistent bench setup produces the same symptom.
- Zero at a distance you'll actually use. Zeroing at 50 yards and hunting at 200 introduces a bullet drop variable unrelated to whether the scope is set correctly.
- Let the scope stabilize before your first shot. A sensor just powered on, or coming from a very different ambient temperature, can still be settling; give it a couple of minutes first.
- Re-check zero after remounting. Any time the scope comes off and goes back on, treat it as a new mount and re-confirm zero rather than assuming it returned to the same position.

Featured Product: ATN ThOR 6 640 2-16x
The ThOR 6 640 2-16x (TIWST6635A) is built around a 640×512 12μm VOx sensor with ≤15mK NETD and a 35mm germanium lens, giving 2-16× optical magnification with digital zoom and a 3100 m detection range. The Control Wheel drives the Zeroing Profile and Zeroing Setup menus used throughout this guide, and Zeroing Freeze pauses the frame at the moment of impact so reticle adjustments aren't a race against a live feed. It ships with a heating target for zeroing, runs on two swappable 18650 batteries for roughly 9 hours, weighs 830 g / 1.83 lbs, and carries an IP67 rating with a 6000-joule recoil rating. Price is $3,625.00 ($3,295.00 promo).
FAQ
How do you sight in a thermal scope?
You mount the scope securely, fire a shot from a stable rest at a heat-visible target, then use the scope's on-screen zeroing menu to move the reticle onto the actual point of impact. A confirmation shot afterward verifies the adjustment held before you consider the rifle zeroed.
How do you sight in a thermal scope during the day?
The same way you would at night, using a heated zeroing target instead of a passive paper target so the aim point stays thermally visible regardless of sun or ambient temperature. Daylight doesn't change the zeroing process itself, only the need for a target that reads clearly under those conditions.
What distance should I zero a thermal scope at?
Zero at a distance that matches your typical shot, since the scope only needs to reflect your actual point of impact at a range you'll use in the field. There's no universal correct distance — it depends on your terrain and the shots you expect to take.
Why does my thermal scope's zero seem to shift between sessions?
In most cases this traces back to an inconsistent rest, a loose ring screw, or remounting the scope rather than the scope itself losing its setting. Re-checking the mount and confirming with a fresh shot is the first troubleshooting step before assuming the electronics are at fault.
Do I need a special target to zero a thermal scope?
A heat-visible target makes the process far more reliable than a plain paper target, which may not show a distinct thermal signature. The ThOR 6 640 2-16x includes a heating target for exactly this reason.
How many shots does it take to zero a thermal scope?
Typically one shot to establish the adjustment and a second to confirm it landed correctly, though a third round of fine-tuning is normal if the confirmation shot isn't centered. It's a faster process than mechanical turret zeroing since the reticle moves digitally instead of in physical clicks.
Get Zeroed and Get in the Field
A clean zero is what makes every other feature on a thermal scope worth having. Browse the full ThOR HD thermal scope lineup to compare models, or read our guide to thermal scopes for AR-15 platforms if you're pairing a scope with a semi-auto build.