How to Recover Wounded Game with a Thermal Scope During...

You just made a shot on a deer at last light. The animal ran. You marked the direction, waited the right amount of time, and now it is mid-morning and you are heading into the woods to recover it. You have a thermal scope on your rifle. The question in your head is a practical one: can you hunt with a thermal scope during the day? More specifically, can you use it to track and recover wounded game when the sun is up?
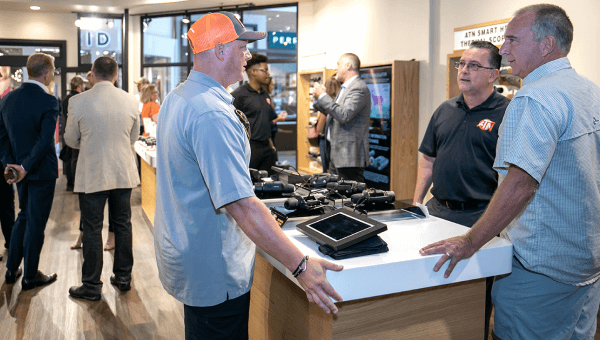
The short answer is yes. The longer answer is that it depends heavily on the scope you are using, how it is set up, and whether you know how to interpret what you are seeing. This guide covers all of that, using the ATN ThOR 6 325 as the primary tool, walking you through setup, zeroing, and actual field use for daytime wounded game recovery.
Can You Use a Thermal Scope During the Day?
Thermal scopes operate on heat detection, not visible light. They read infrared radiation emitted by objects, which means daylight or darkness is largely irrelevant to how the sensor functions. A daytime thermal scope works just as well at noon as it does at midnight, as long as there is a heat differential between your target and the surrounding environment.
That said, daytime thermal use comes with some specific challenges hunters need to understand:
- Thermal contrast drops in midday heat. As ambient temperatures rise, the difference between a warm-blooded animal and its surroundings narrows. This makes detection harder in open, sun-baked terrain during peak afternoon hours.
- Early morning and overcast days are ideal. When ground temperatures are cooler, a deer or hog will stand out clearly against the background.
- Dead or recently deceased animals retain heat. A deer that expired hours ago will still be warmer than the surrounding vegetation for a considerable period, making thermal highly effective for locating downed game.
- Blood trails and disturbed brush show heat signatures. In cooler morning conditions, freshly disturbed leaves and blood can appear as faint heat signatures that guide your recovery path.
So yes, can you hunt with a thermal scope during the day is a question with a definitive yes attached to it, provided your scope has the sensitivity to handle reduced thermal contrast. That is exactly where the ATN ThOR 6 325 earns its place in this conversation.
ATN ThOR 6 325 Review 2026: Why This Scope for Daytime Recovery?
The ATN ThOR 6 325 review 2026 conversation starts with one number: 15mK NETD. That is the thermal sensitivity rating of the sensor inside this scope. NETD stands for Noise Equivalent Temperature Difference, and a lower number means the sensor can detect smaller differences in temperature. At 15 millikelvin, the ThOR 6 325 is among the most sensitive uncooled thermal sensors available in a production hunting riflescope today.
For daytime game recovery, sensitivity is everything. When a deer has been lying in cover for six hours and the morning sun has been warming the ground, the temperature gap between the animal and the brush around it is smaller than it was at 3 AM. A scope with poor sensitivity will lose that signature in the noise. The ThOR 6 325 holds it clearly.
Beyond raw sensitivity, ATN has built genuine intelligence into this platform. The proprietary SharpIR AI-enhanced imaging processes every pixel in real time, sharpening edges and improving target separation. In a recovery scenario, this means the difference between identifying a deer bedded in tall grass versus watching a smear of warm color that could be anything.
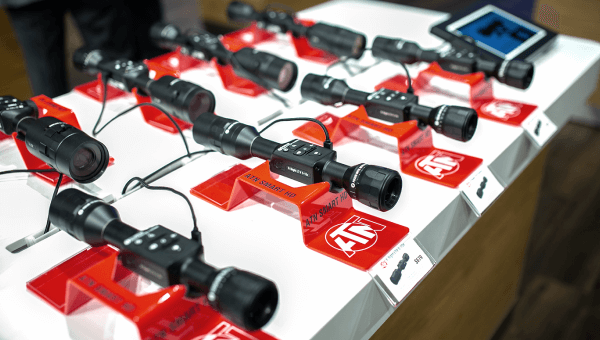
ATN ThOR 6 325 Specs: What You Are Working With
Before you head into the field with any optic, you need to understand its capabilities and limitations. Here is a full breakdown of the ATN ThOR 6 325 specs that directly affect daytime recovery use:
- Sensor resolution: 384×288
- Pixel pitch: 12μm
- Thermal sensitivity (NETD): 15mK or better
- Detector type: 12μm VOx Uncooled Focal Plane Array
- Lens: 25mm Germanium, F/1.0
- Magnification: 2.5-20x with step and smooth zoom
- Field of view: 10.53° x 7.91°
- Detection range: 2,300 meters
- Display: 0.49-inch OLED at 1920x1080 resolution
- Refresh rate: 50Hz
- Digital zoom: 1x, 2x, 4x, 8x
- Color palettes: White Hot, Black Hot, Iron Red, Alarm, Green Hot, Sepia
- Battery: Two 18650 rechargeable cells, approximately 9 hours runtime
- Internal storage: 64GB
- Weight: 790g / 1.74 lbs
- Waterproof rating: IP67
- Operating temperature: -30°C to +55°C
- Recoil rating: 6,000 Joules / 1,000g acceleration over 0.4ms
- Mounting: 30mm rings (not included)
The 2.5-20x magnification range is particularly relevant for recovery work. At lower magnification, you get a wide field of view for scanning large areas of cover. Dialing up to higher magnification lets you confirm an animal identity and assess its condition before you approach. The Picture-in-Picture mode allows you to simultaneously maintain wide situational awareness while zooming into a specific area, which is exactly the kind of tool you need when you are not sure if an animal is down or just bedded.
Thermal Scope Setup Guide: Getting the ThOR 6 325 Ready Before You Hunt
A recovery situation is not the time to be fumbling with settings. Your thermal scope setup guide needs to be completed before you ever walk into the timber. Here is how to properly configure the ATN ThOR 6 325 for hunting and recovery use.
Step 1: Mount the Scope Correctly
The ThOR 6 325 requires 30mm rings, which are not included in the box. Use quality rings that match your rifle's rail system. Mounting height matters for thermal scopes more than it does for traditional optics because you are not dealing with an objective lens that needs clearance from the barrel. Mount it at a height that allows a natural cheek weld on your stock. Over-elevated mounts cause shooting fatigue and inconsistent head position.
Torque your ring screws to the manufacturer's spec, not finger-tight. Thermal scopes experience the same recoil forces as any other optic. The ThOR 6 325 is rated to 6,000 Joules, but that rating assumes the scope is properly mounted.
Step 2: Power On and Adjust the Display
The ThOR 6 325 has a startup time of under 7 seconds from a cold start and is nearly instant from standby mode. Once powered on, adjust the diopter ring behind the eyepiece to bring the display into sharp focus for your eye. The diopter range is -5 to +5D, which accommodates most vision prescriptions without eyeglasses. This adjustment is for the display itself, not the thermal image. Get it sharp before you do anything else.
Next, set your color palette. For daytime recovery in varied terrain, White Hot is typically the most intuitive starting point. The target animal will appear bright white against a cooler gray-green background. Switch to Black Hot if you find glare from sun-warmed rocks or metal is creating too much visual noise in your scene.
Step 3: Adjust NUC Settings
Non-Uniformity Correction (NUC) calibrates the sensor to produce a clean, flat image. The ThOR 6 325 offers Auto, Semi-Auto, and Manual NUC modes. For most hunting applications, Auto NUC works well. The scope periodically corrects itself when it detects image degradation. You will notice a brief flicker when it runs.
In the field during recovery, if your image looks washed out or has a fixed-pattern noise visible across it, run a manual NUC. With the scope pointed at a neutral background like the sky or a flat field, trigger the NUC correction from the menu. The image will reset and sharpen significantly.
Step 4: Configure Hot Point Tracking
Hot Point Tracking is one of the most underutilized features on the ThOR 6 325 for recovery work. Activate it from the settings menu and the scope will automatically highlight the hottest object in your field of view in real time. When you are scanning dense cover looking for a downed deer, this is invaluable. The scope does the detection work for you, flagging heat signatures instantly without you having to interpret every warm spot manually.
Enable this feature before you start scanning. It does not affect image quality for normal use and can be toggled off quickly if it becomes distracting in scenarios where there are many warm objects in the frame.

How to Zero a Thermal Scope: Getting the ATN ThOR 6 325 Dialed In
Proper zeroing is the foundation of everything. Knowing how to zero thermal scope systems like the ThOR 6 325 correctly is what separates a useful recovery tool from an expensive weight on your rifle.
Step 1: Use the Included Heated Target
ATN includes a heated target in the box with the ThOR 6 325. This is a purpose-built zeroing aid. Unlike paper targets, which have minimal thermal contrast and can be nearly invisible through a thermal scope, the heated target creates a strong, easy-to-see heat signature. Place it at your chosen zeroing distance, typically 100 yards for most hunting applications, and allow it to heat up before you begin shooting.
Step 2: Fire a Three-Shot Group
Fire a stable three-shot group from a solid rest. You are not trying to hit a specific point of aim yet. You are establishing where the rifle is currently impacting relative to your reticle. Keep your shots as tight as possible to give yourself an accurate average impact point to work from.
Step 3: Use Zeroing Freeze to Make Adjustments
This is where the ThOR 6 325 makes zeroing genuinely easy. After your last shot, activate Zeroing Freeze from the menu. The scope freezes the image at the moment of impact, holding that last shot's entry point visible on screen while you make reticle adjustments. You can now physically move the reticle to your point of impact without losing the reference point.
Without this feature, you would need to quickly spot your impact, memorize or mark it, and then try to adjust the reticle before the heat signature fades. Zeroing Freeze eliminates that entire problem. Take your time, make your adjustments precisely, and confirm with a follow-up shot group.
Step 4: Save Your Zero to a Weapon Profile
Once you have confirmed your zero, save it to a weapon profile in the scope's menu. The ThOR 6 325 supports multiple profiles, allowing you to store separate zeros for different rifles or loads. Label each profile clearly. If you move the scope to a different rifle for hog hunting after deer season, you can return to your original zero instantly without going back to the range.
Step 5: Verify at Field Distance
A 100-yard bench zero is a starting point. Walk out to a realistic hunting distance, 150 or 200 yards depending on your typical shooting scenarios, and verify your point of impact is where you expect it to be. Make any final corrections using the same Zeroing Freeze method. Your zero is now hunting-ready.
Step-by-Step: Recovering Wounded Game with the ATN ThOR 6 325 During the Day
You have the scope mounted, zeroed, and configured. Now it is the morning after your shot and you are heading into the field. Here is how to use the ATN ThOR 6 325 effectively to locate and recover your animal.
Step 1: Assess Conditions Before You Enter
Thermal recovery during the day is most effective when ambient temperatures are lower. Early morning after a nighttime hunt is ideal. Before you enter the cover, glass the area from your last known position using the ThOR 6 325 at lower magnification, around 2.5x to 5x, to take advantage of the full 10.53-degree field of view.
Scan slowly and methodically. A bedded or downed deer will appear as a distinct warm mass against cooler vegetation. With Hot Point Tracking enabled, any significant heat source will be flagged automatically. Look for shape and size, not just warmth. A large oval or elongated shape lying still in dense cover is almost certainly your animal.
Step 2: Use the Color Palette for Maximum Contrast
Daytime recovery in heavy cover often benefits from switching away from White Hot to Iron Red or Alarm mode. These palettes create a higher-contrast visualization where the warmest objects appear in striking colors against a neutral background. In dense dark timber where White Hot can blend into general warmth, Iron Red or Alarm modes make the animal pop visually.
Experiment as you scan. The ATN ThOR 6 325 allows instant palette switching from the three-button interface. Switching takes two button presses and does not interrupt your scan.
Step 3: Use PIP Mode to Confirm the Target
Once you have located a heat source that matches the size and shape of your animal, use Picture-in-Picture mode to zoom in for a closer look while maintaining your wide field of view in the secondary window. Dial the center zoom up to 8x or higher and look for body shape confirmation: legs, ears, head, the distinctive outline of a deer or hog.
This is critical for two reasons. First, you want to confirm what you have found before approaching, especially in bear country or dense hog habitat where you do not want to walk up on a living, dangerous animal unprepared. Second, the PIP view at high zoom helps you assess whether the animal is still alive and if a follow-up shot is necessary before recovery.
Step 4: Scan the Blood Trail
Even during the day, fresh blood retains some heat above ambient temperature, particularly in cooler morning conditions. Move slowly along the suspected travel path and scan the ground with the ThOR 6 325 at low magnification. Freshly disturbed leaves, bent grass, and blood droplets may show subtle warmth that helps you reconstruct the animal's path through cover.
This technique is most effective within the first two to three hours after a shot in cool weather. As the day warms, ground temperature rises and the contrast of blood against the environment decreases. Work the trail while you still have the temperature advantage.
Step 5: Activate Recoil Activated Video for Any Follow-Up Shots
If you locate the animal and determine a follow-up shot is necessary, make sure Recoil Activated Video (RAV) is active. RAV automatically records 10 seconds before and 10 seconds after the shot without any manual input required. This documents your exact point of aim, the moment of impact, and the animal's reaction, which is useful both for shot analysis and for hunting records.
With 64GB of internal storage, you have space for an extensive library of video without managing SD cards. After recovery, you can review the footage directly on the scope's internal gallery or transfer it via USB-C.
Step 6: Share the View with a Recovery Partner
If you have a hunting partner assisting with recovery, connect your smartphone or tablet to the ThOR 6 325 via the built-in Wi-Fi hotspot and open the ATN Connect 6 app. Your partner can see the exact same thermal view on their device in real time. This is useful for coordinating approach routes, directing someone to a specific heat source location from a distance, or having a second set of eyes interpreting what the scope is showing.
No internet connection is required. The scope creates its own direct hotspot. Connection is straightforward and the live feed is smooth and usable even at higher magnification settings.
Practical Tips for Daytime Thermal Recovery
Shade and Cover are Your Friends
Animals that have bedded or expired in shaded, forested areas will have better thermal contrast than those lying in direct sunlight. Sun-warmed ground can approach body temperature in peak afternoon heat, making detection difficult even with a 15mK sensor. If you are recovering in shade, your thermal image will be sharper and detection will be easier.
Run a NUC Before Critical Scanning
Before you begin your recovery scan, pause for thirty seconds and run a manual NUC with the scope pointed at the sky or a neutral background. This clears any sensor non-uniformity that has built up since the last automatic correction and gives you the cleanest possible starting image for your scan.
Do Not Rush the Scan
Moving the scope too quickly through cover is the most common mistake with thermal during recovery. Heat signatures take a fraction of a second to register and be processed by the SharpIR AI system. Move the scope in slow, deliberate horizontal sweeps. Pause briefly at any object that does not match the expected thermal profile of vegetation. The 50Hz refresh rate of the ThOR 6 325 handles motion smoothly, but the human eye still benefits from a slower, more methodical approach.
Account for Thermals and Terrain
Thermal heat can pool in low areas, ravines, and against south-facing rock faces on sunny days, creating bright warm spots that can confuse scanning. Know your terrain. A bright warm spot at the base of a hill in early afternoon is more likely ground heat than an animal. Size, shape, and consistency of the heat signature tell you more than brightness alone.
Why the ATN ThOR 6 325 Is the Right Tool for This Job in 2026
There are other thermal scopes available in 2026. Most are either cheaper and less capable, or more expensive and offering marginal gains for hunting use. The ATN ThOR 6 325 occupies a practical sweet spot: serious 6th generation thermal performance, genuine AI enhancement, a feature set built for real field conditions, and a weight under 1.75 pounds that does not punish you on long recovery walks.
The combination of a 15mK NETD sensor, SharpIR AI processing, Hot Point Tracking, Zeroing Freeze, RAV recording, and 9 hours of battery life creates a platform that handles every phase of a hunt, from the shot to the recovery, without requiring you to swap gear or adjust your workflow. The ATN ThOR 6 325 specs are not marketing language. They represent a sensor and processing system that delivers in the field, in conditions that would wash out lesser optics.
For hunters who take wounded game recovery seriously, having a reliable daytime thermal scope is not a luxury. It is an ethical obligation. The ability to locate an animal that went into heavy cover and recover it cleanly, regardless of whether you are working in darkness or full daylight, is exactly what separates hunters who consistently recover game from those who do not.
What Comes in the Box
The ATN ThOR 6 325 ships ready to go to work. In the box you will find:
- ATN ThOR 6 325 Thermal Scope
- Two 18650 rechargeable batteries (one internal, one replaceable)
- Battery charger
- USB Type-C cable
- Heated zeroing target
- Lens cloth
- Carrying bag
- Quick start guide and user manual
The inclusion of the heated zeroing target is worth calling out specifically. It is a practical detail that tells you ATN understands how hunters actually use these products. You can zero the scope properly the day it arrives without sourcing any additional equipment.
Final Assessment
The question of can you hunt with a thermal scope during the day is settled. You can, and with the right scope and technique, you can do it effectively enough to recover game that would otherwise be lost. The ATN ThOR 6 325 is built for exactly this kind of demanding, real-world use across every season and every light condition.
The ATN ThOR 6 325 review 2026 verdict is straightforward: this is a purpose-built hunting tool with genuine 6th generation thermal capability, smart features that work when it matters, and the rugged construction to handle field abuse without complaint. If you are serious about recovery and predator hunting and you want a scope that performs in daylight as confidently as it does at night, the ThOR 6 325 belongs on your rifle.